Free guide
How to shoot a rental on your phone
Ten minutes, whatever light the room has, and no photographer.
By Mile Sabljak. I’ve photographed real estate since 2005.
First, the honest part
If a listing deserves a photographer, book the photographer. A campaign sale with a real marketing budget should get a real shoot — proper gear, proper time, someone who does it every day.
This guide isn’t about those listings.
It’s about the other ones. The re-let that has to go up tomorrow. The granny flat. The unit the landlord won’t spend a cent on. The property you’re standing in right now with eleven minutes before your next inspection.
Those get photographed too. Usually on a phone, in whatever light the room happened to have. That’s the job this guide is for.
One rule underneath all of it: a rental photo has to show the place as it is. Not better than it is. A tenant who feels misled at the inspection is worse than no inspection.
Before you walk in
The two-minute tidy — only what’s yours to move
If the property is vacant, a quick pass helps:
- Toilet lids down. Every time. It’s the single most common thing agents forget.
- Bins — out of frame, in every room.
- Cables — anything trailing across a floor.
- Mats and rugs — straighten them or lift them.
If someone lives there, don’t. Not the benchtop, not the shoes by the door, not the towels. They’re not clutter, they’re somebody’s things, and moving them is a fast way to lose a tenant’s goodwill on an inspection you still have to do. Shoot the room as you found it. A tenant’s belongings can be tidied in the photo afterwards — that’s what Digital Tidy is for, and it’s the reason it exists.
Shot as found
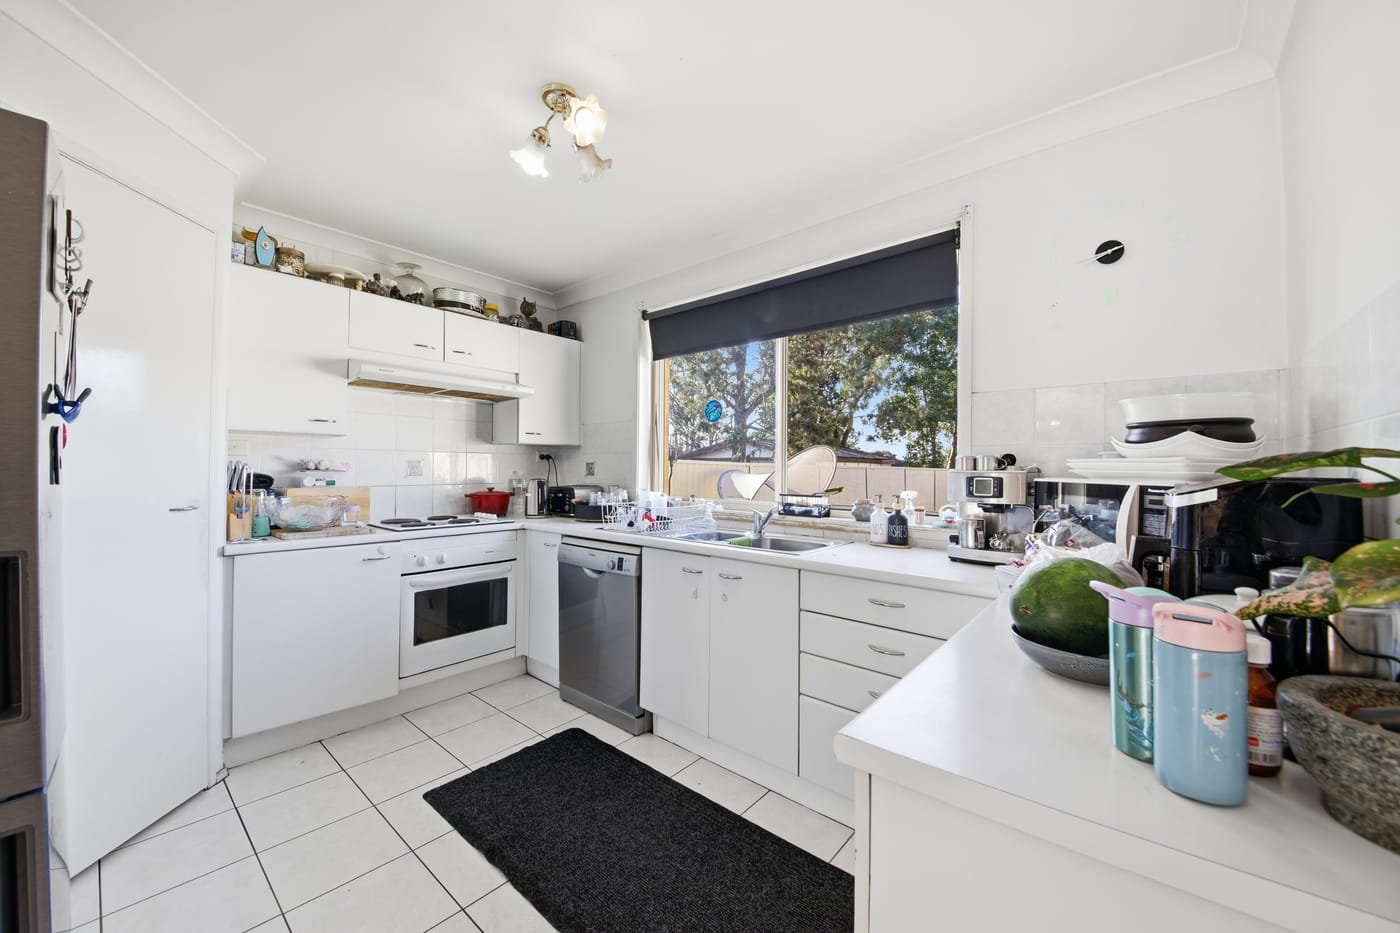
Digitally tidied

A real job. Nobody moved anything on the day — the tenant’s things came off the benches and the floor afterwards.
Same logic outside. If the car in the driveway belongs to the tenant, it stays. So does the trailer, the boat and the bins they’re not home to move. You photograph what’s there and take the car out of the picture afterwards.
Shot as found
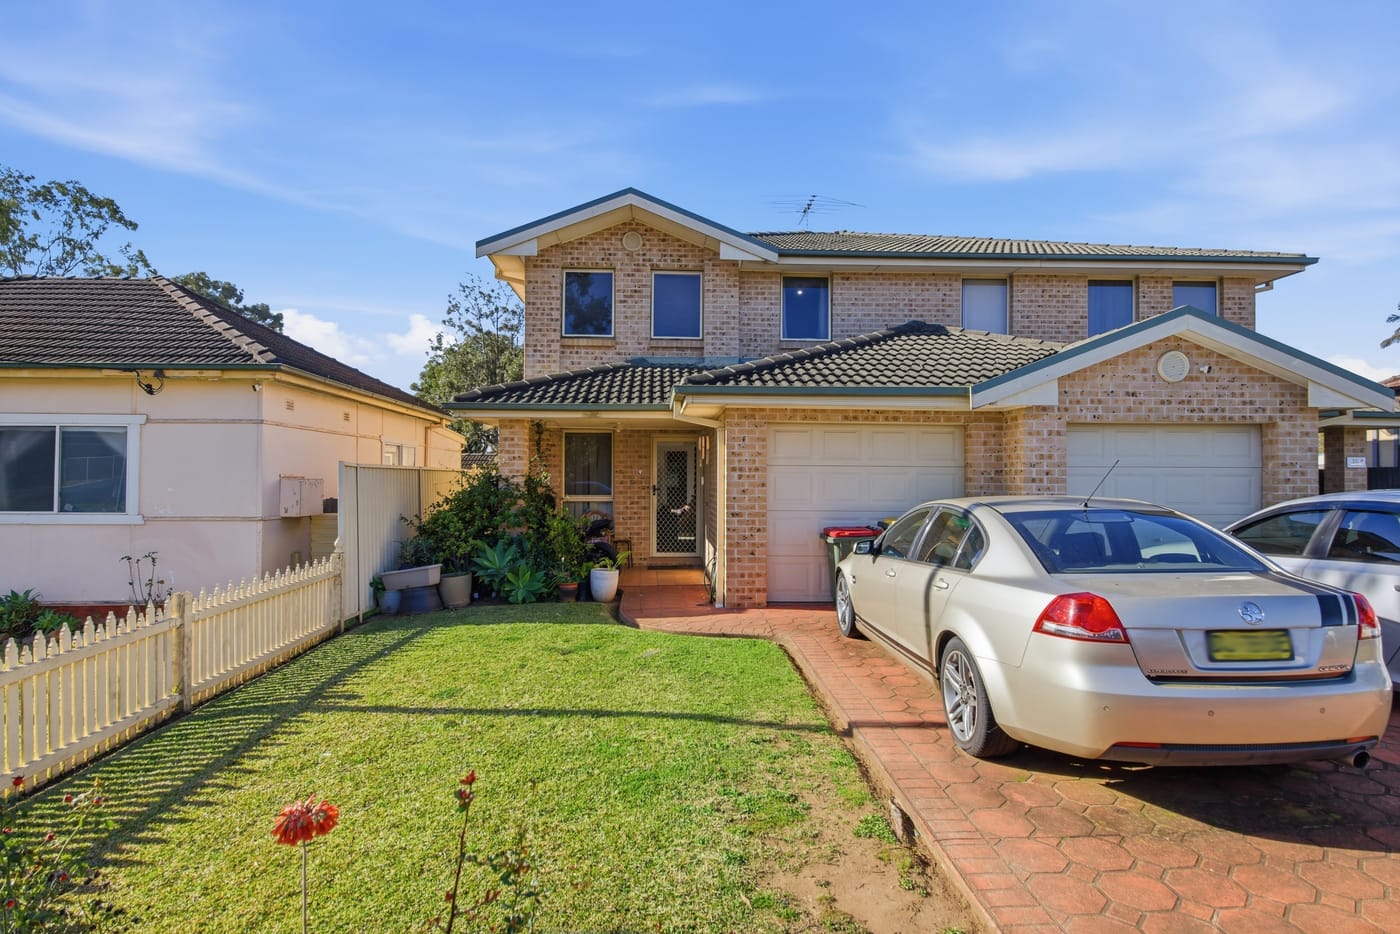
Objects removed

Two cars and a bin, gone. The house, the fence, the lawn and the sky are exactly as they were — the driveway is simply visible again.
This is the part of shooting a tenanted property that used to mean a return visit, or an awkward conversation, or just a worse photo. It doesn’t have to be any of those.
Both are optional extras you buy on a finished photo you’ve picked yourself. Nothing is applied to your photos unless you ask for it.
Lights on. All of them.
Every light in the property, including the ones you think are pointless in daytime. It looks wrong to your eye. It reads better in the photo — it lifts the corners the window can’t reach.
Blinds and curtains open
All the way. If there’s a view, that’s the view. If there isn’t, natural light beats a dark rectangle regardless.
The five shots
Every rental listing needs these. One good frame each is enough.
- The front — the shot everyone sees first, in the portal scroll.
- The main living area
- The kitchen
- The main bedroom
- The bathroom
Everything past those five is a bonus. Five good frames beat twenty average ones, and a portal gallery that opens strong gets looked at properly.
Where to stand
In a corner, phone at chest height, held level. That’s most of it.
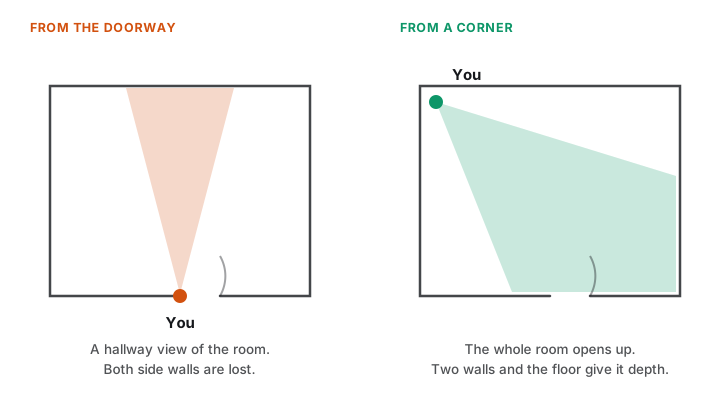
- The corner gives you the whole room. Standing in the doorway gives you a hallway view of it.
- Chest height is the natural one. Eye height makes floors dominate; hip height makes ceilings dominate.
- Level matters more than anything else here.
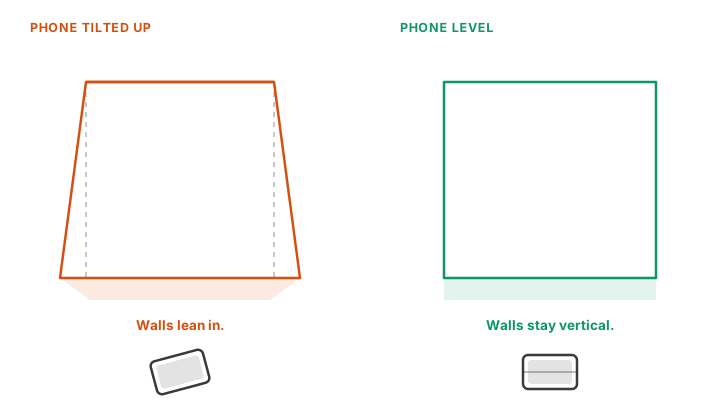
Take more frames than you think you need. You’re not paying per shot, and a second angle of the living room costs you four seconds.
The front shot
It’s the one that carries the listing, and it’s the one most often rushed.
- Stand back further than feels right, then step to one side. A slight angle shows the depth of the house; dead-on flattens it.
- Bins and cars — move them if they’re yours to move. If the tenant is out, or the trailer hasn’t shifted in a year, leave it and shoot anyway.
- Brown grass, overcast sky — shoot it anyway. Weather isn’t a property fault.
Three of those four are fixable after the fact: the sky, the grass, and the car or trailer sitting where you’d rather it wasn’t. The one thing that isn’t fixable is a frame taken from the wrong spot — so spend your ten minutes on where you stand, not on what you can shift.
Off the phone

After editing

A real job. The same home the same afternoon — sky and light recovered.
The yard
Worth a frame on any rental with one, and it’s the shot most often skipped because the lawn looks rough on the day. Shoot it anyway.
Shot as found
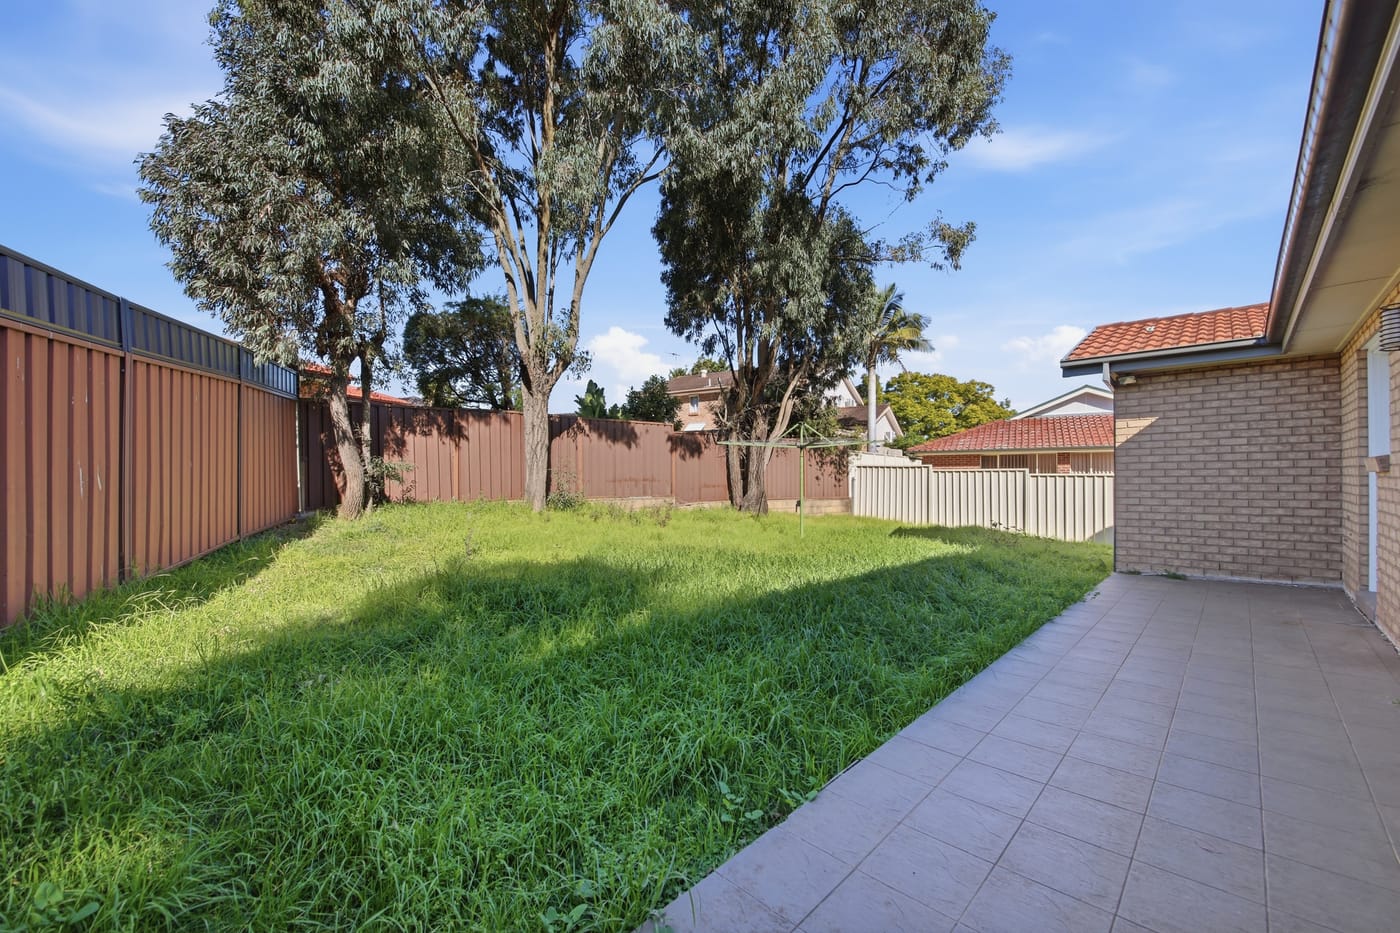
Grass repaired

Long and patchy to even and green. The trees, fences, clothesline, paving and sky are all where they were.
Use this one the way you’d use a mower. A lawn is a maintenance state, not a feature of the property — it’s long on Tuesday and cut on Thursday, and it’ll be cut before the tenant moves in. Showing it the way it will be is fair. Showing a lush lawn on a yard that is never going to see one isn’t, and that’s the same rule as everywhere else in this guide: the photo has to show the place as it is.
The rooms that come out dark
This is the one everybody hits.
You’re standing in a room that looks perfectly fine. The photo comes back grey, or orange, or with a window that’s gone pure white.
That’s not you. It’s the phone deciding between the bright window and the darker room, and it can’t have both. Your eye can. The sensor can’t.
What helps at the property
- Turn on every light, as above.
- Don’t stand with the window directly in front of you. Shoot across it rather than into it.
- Tap the screen on the darker part of the room so the phone exposes for the room instead of the window.
- Hold still for a beat after you tap. Dark rooms mean slower shutter, and slower shutter means a smudged frame if you’re already walking.
What doesn’t help: your flash. It flattens the room, throws a hard shadow behind everything, and turns warm walls a strange colour. Leave it off.
Off the phone

After editing

A real job. The room came off the phone warm and a little flat; the edit brings it back to neutral. None of that is fixable standing in the room.
The rest — the blown-out window, the carpet pulling the whole room warm — is a fix-it-afterwards problem, not a stand-there-longer problem. Get the frame straight and move on.
Two settings, then stop fiddling
- Grid or level: on. The difference between straight walls and leaning ones.
- HDR: on, if your phone lets you choose. It’s the setting that holds both the window and the room.
That’s it. Portrait mode blurs the background, which is the opposite of what a room shot needs. Filters bake in a look that can’t be undone later. Wide-angle is genuinely useful for small bathrooms, but it bends straight lines at the edges — use it where you need it, not everywhere.
Wide for portals, tall for socials
Decide at the property. It takes ten seconds and saves a return trip.
- Landscape (wide) for the portal listing. That’s the shape realestate.com.au and Domain display.
- Portrait (tall) for anything going to Instagram, Facebook or a story.
If the property matters to you, take the hero shot both ways while you’re standing there.
When a twilight shot is worth it
A dusk facade is the strongest single image a listing can have. It’s also the one that costs you a second trip at exactly the wrong time of day.
It’s worth it when the property has something dusk flatters — a good facade, decent landscaping, big windows that glow from inside. It’s not worth it for a unit in a block, where the facade isn’t really the property.
Daytime frame
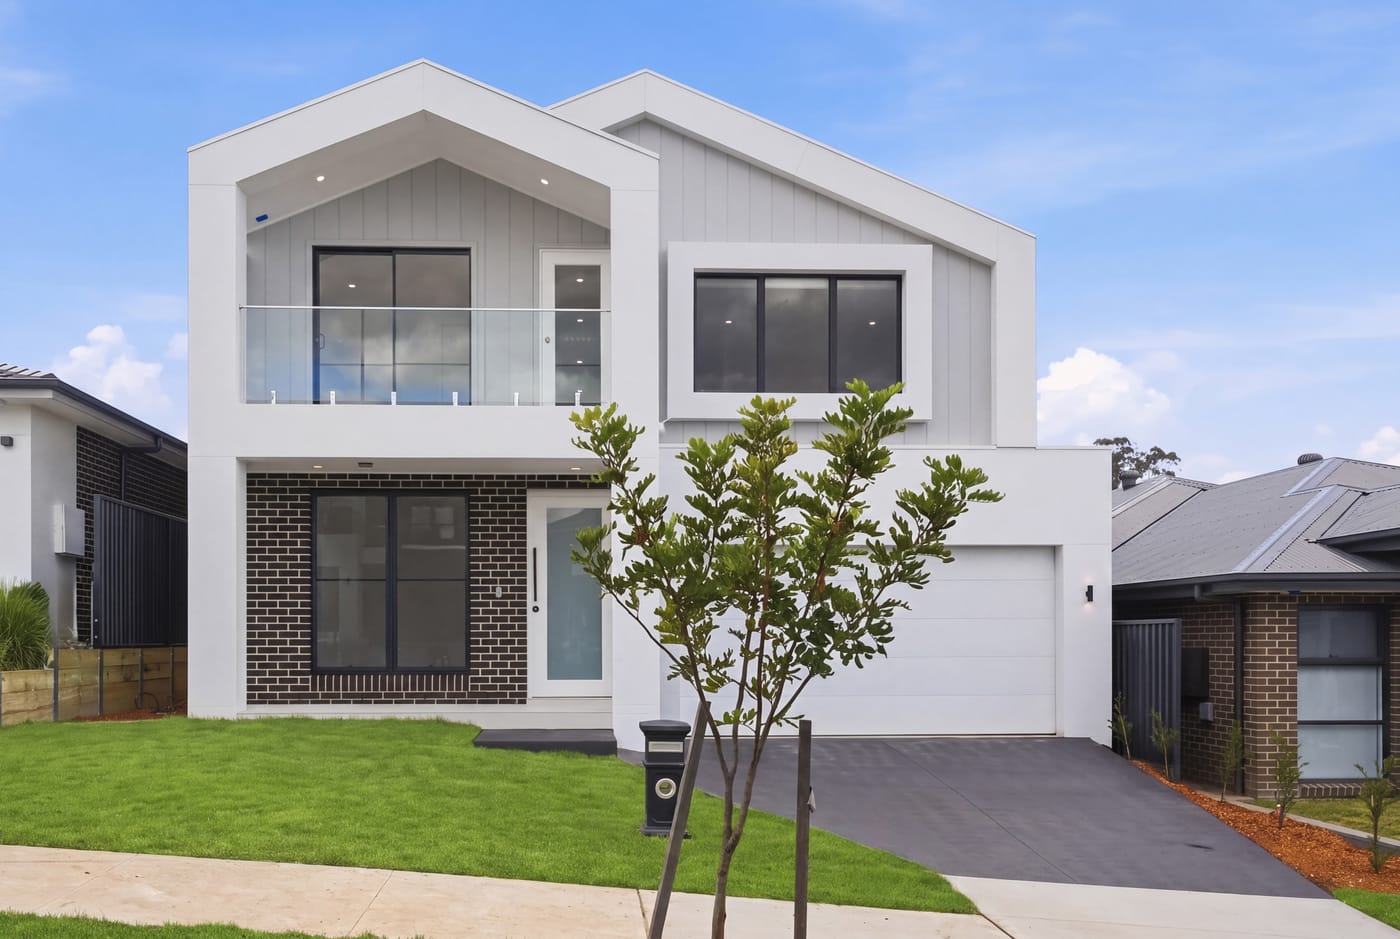
Turned to dusk

You don’t need to go back at sunset. Just take the daytime one properly: level, bins gone, lights on inside if you can.
What you don’t need
- A tripod. Level and steady is enough for a rental.
- A DSLR. If you own one and shoot with it, good. This guide assumes you don’t.
- Editing on your phone. Filters and brightness sliders bake in decisions that can’t be reversed. Leave the file alone.
- Twenty photos. Five good ones, then stop.
The ten-minute version
Print this bit if you print nothing else.
- Every light on. Every blind open.
- Tidy only what’s yours to move. A tenant’s things stay where they are.
- Corner of the room, phone at chest height, held level.
- Tap the screen on the darker part of the room. Hold still.
- Five shots: front, living, kitchen, bedroom, bathroom.
- Front shot — slight angle, stand well back. Leave what won’t move.
- Hero shot twice: wide for the portal, tall for socials.
- Flash off. Filters off. Don’t edit on the phone.
That’s the shooting half. The light is the other half — and that part the app does for you: upload from your phone, and the photos come back bright, straight and properly exposed, usually in about an hour. Your first five photos are free once you confirm your email.
Try it on your next listingWant it as a PDF?
Same guide, laid out to print and keep in the car. Download it directly — no email needed. Or have it sent to you:
Afterwards
Everything left over — the yellow cast off the ceiling lights, the window that’s gone white, the grey overcast sky, the walls that never look properly white — is light and colour. That’s the part you can’t fix standing in the room, and the part you shouldn’t try to fix on your phone.
That’s what I built SABO Studio for. You shoot the place yourself, upload from your phone, and the photos come back bright, straight and properly exposed. One credit is one photo, and most jobs come back in about an hour. Your first five photos are free once you confirm your email.
But the guide above works whether you ever use it or not. It’s twenty years of standing in other people’s living rooms, and none of it is a secret.
